Studio Light:100% The Ultimate Guide for Perfect Lighting in Photography and Videography
Introduction to Studio Light
In photography and videography, Studio Light is crucial.Whether you’re capturing a portrait, shooting a product, or creating a cinematic masterpiece, the right studio lighting setup can transform your work from amateur to professional.With so many lighting options and techniques available, where should you begin?This guide breaks down everything you need to know about studio lighting, from types of lights to setting up your own studio.
What is Studio Light?
Studio light refers to artificial lighting used in controlled environments like photography studios, home setups, and film sets. It provides consistent illumination, helping photographers and videographers achieve the perfect exposure, contrast, and mood for their subjects.
Importance of Proper Studio Lighting
Proper studio lighting is crucial for achieving high-quality visual content, whether you’re shooting photos, recording videos, or creating professional-grade films. Here’s why proper lighting is essential:
Enhances Image Quality: Proper lighting brings out the details in your subject, highlighting textures, colors, and contrasts. It prevents underexposed or overexposed images and ensures that your shots look polished and professional.
Sets the Mood and Atmosphere: Lighting plays a huge role in conveying the mood of a scene. Soft, warm lights can create a cozy or intimate vibe, while harsh, bright lights can evoke energy or tension. The right lighting helps you tell a visual story and connect with your audience.
Gives Control Over Shadows and Highlights: Controlling shadows and highlights is key in studio settings. Good lighting allows you to reduce harsh shadows, emphasize important features, and create the perfect balance between light and dark areas.
Improves Subject Focus: Whether you’re working with people, products, or scenes, the right lighting draws attention to the subject. It ensures your main focus is clear and stands out, enhancing the overall composition.
Consistency Across Shots: In controlled studio environments, consistent lighting ensures that your shots maintain the same look and feel across different angles and setups. Consistency is crucial in professional photography and videography, especially for projects that involve multiple shots.
Supports Creative Flexibility: Mastering studio lighting gives you creative freedom to experiment with different looks and styles. You can easily switch between soft and hard lighting, adjust colors, or try out various lighting techniques to achieve the desired effect.
Types of Studio Lights
Continuous Lighting
Continuous lights stay on, giving you a constant light source to work with. They’re perfect for beginners and videographers who need to see how the lighting affects the scene in real time.
Strobe Lighting
Strobe lights emit bursts of light when triggered. They are more powerful than continuous lights and are commonly used in professional photography.
LED Lights
LED lights are popular because they are energy-efficient and versatile.They come in various colors and are perfect for both photography and videography.
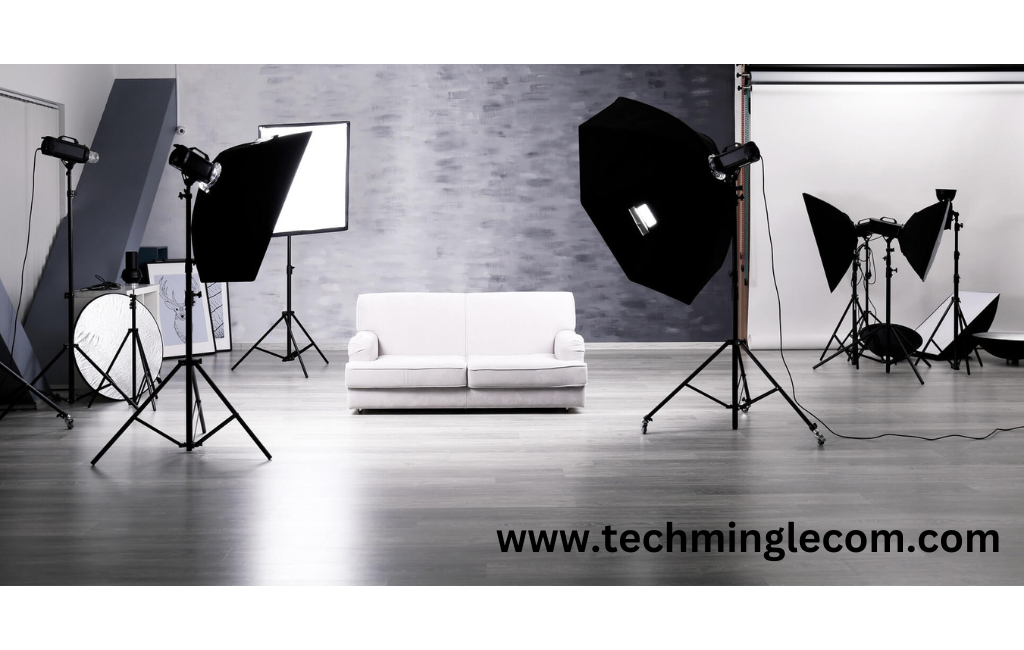
Key Components of Studio Lighting Setup
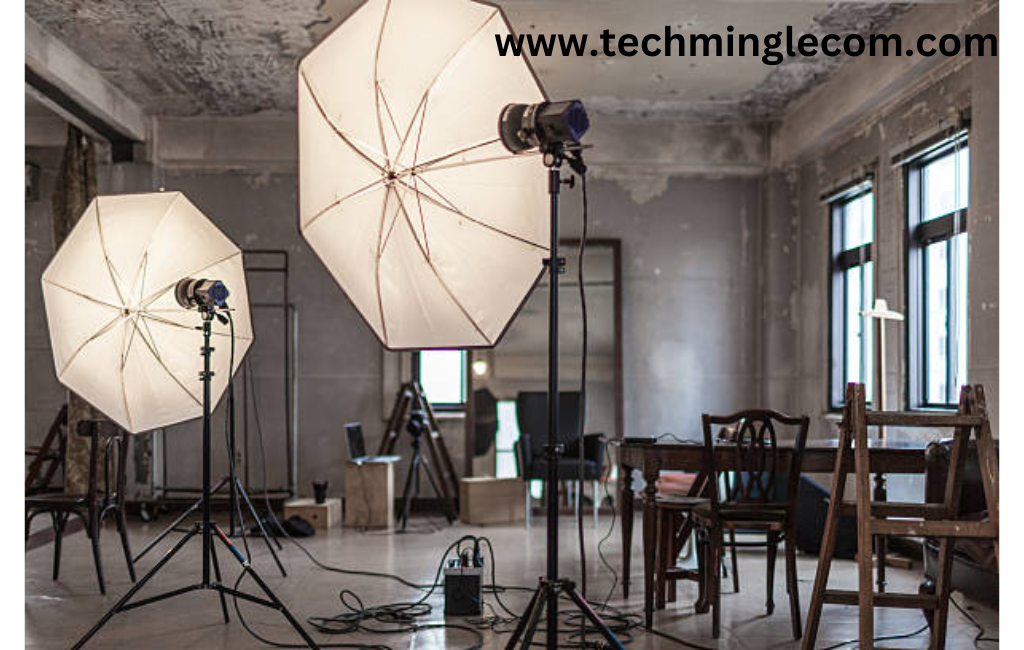
Light Stands
Light stands are crucial for adjusting your lights to the correct height and angle.They provide stability and flexibility in your setup.
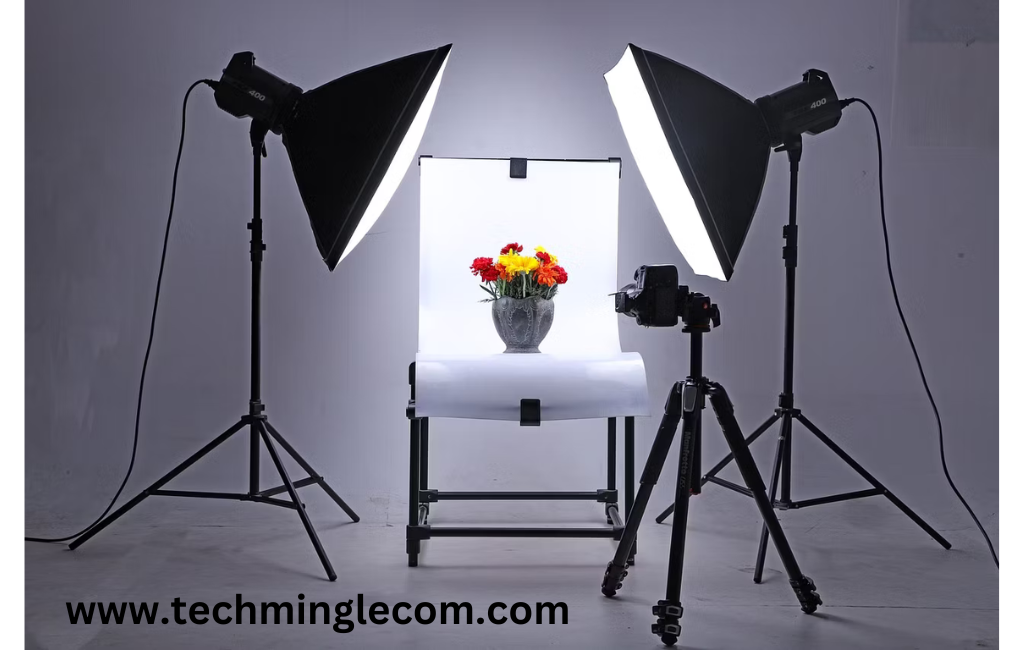
Softboxes and Diffusers
Softboxes and diffusers spread out the light, reducing harsh shadows and giving your images a soft, natural look.
Reflectors
Reflectors bounce light back onto your subject, reducing shadows and increasing overall brightness.
Backgrounds
While not a light source, the background plays a key role in your setup. Choose a background that complements your subject and works well with your lighting arrangement.
Understanding Lighting Techniques
Three-Point Lighting Technique
This is a classic lighting setup involving a key light, fill light, and backlight. It’s versatile and works well for portraits and interviews.
Rembrandt Lighting
Named after the renowned painter, this technique creates a triangle of light on the shadowed side of the face, adding depth and drama.
Butterfly Lighting
Often used in beauty photography, butterfly lighting places the light directly in front of and above the subject, creating a butterfly-shaped shadow under the nose.
Choosing the Right Studio Lights
For Photography
Consider strobe lights for photography, as they provide the power and flexibility needed for crisp, high-resolution images.
For Videography
For videography, continuous lights or LED panels are ideal because they offer constant illumination and can be easily adjusted.
Continuous vs. Strobe Lighting: Which is Better?
The choice between continuous and strobe lighting depends on your needs. Continuous lights are great for beginners and videographers, while strobe lights are preferred by professional photographers for their power and ability to freeze motion.
How to Set Up a Professional Studio Lighting Setup
Setting up a professional studio lighting system can seem daunting, but breaking it down step-by-step makes the process manageable. Whether you’re a beginner or a seasoned professional, understanding the key components and setup techniques is crucial for achieving the perfect shot.
Determine Your Lighting Needs
Before setting up, consider the type of content you’ll be producing—portraits, products, or videos. Different setups work best for different purposes. For example, portrait photography typically needs a more complex lighting setup compared to product photography.
Start with a Basic Three-Point Lighting Setup
The three-point lighting setup is a foundational technique used in most studio environments. It includes:
Key Light: The primary light source that provides the main illumination.Position it at a 45-degree angle from your subject.Fill Light: A secondary light used to soften the shadows created by the key light.
Fill Light: A secondary light that softens shadows created by the key light. It’s typically placed on the opposite side at a lower intensity.
Backlight (or Rim Light): Positioned behind the subject, this light separates the subject from the background, creating depth.
This setup is versatile and can be adapted for most photography and videography needs.
Choose the Right Lighting Equipment
Select the type of lights that best fit your goals:
Strobe Lights: Powerful and ideal for photography, offering bursts of light.
Continuous Lights: Constant light sources that are ideal for videography.
LED Panels: Versatile, energy-efficient, and easy to adjust for both photography and video.
Consider investing in lights with adjustable brightness and color temperature for more control.
Position Your Lights Correctly
Proper light placement is key to creating flattering, professional-looking images:
Height: Place the key light slightly above eye level and angle it downward for a natural look.
Distance: Experiment with how far the lights are from your subject. Closer lights create softer shadows, while more distant lights can be harsher.
Adjust each light until you achieve the desired balance of shadows and highlights.
Use Light Modifiers
Light modifiers like softboxes, umbrellas, and reflectors are essential for shaping light:
Softboxes: These diffuse light, creating a soft and even spread. They’re ideal for reducing harsh shadows.
Umbrellas: More portable and flexible, they work similarly to softboxes but with broader light dispersion.
Reflectors: Use reflectors to bounce light back onto your subject, filling in shadows or adding highlights.
These modifiers give you more control over light quality and direction.
Consider Background Lighting
Background lights help add depth and dimension to your shots. Use a separate light focused on the background or add colored gels to create a specific mood.
Test and Adjust Your Setup
Once everything is set up, take some test shots. Evaluate how the lighting affects your subject and make necessary adjustments. Tweak the intensity, positioning, and angles until you achieve the perfect balance.
Fine-Tuning for Specific Styles
For more advanced setups, you might need additional lights or modifiers. For example:
Low-Key Lighting: Requires a stronger emphasis on shadows for a dramatic look.
High-Key Lighting: Uses brighter lights and minimal shadows for a clean, upbeat feel.
Experimenting with different setups will help you master more complex lighting techniques.
Studio Lighting for Portrait Photography
Lighting for Different Skin Tones
Adjust the intensity and warmth of your lights to flatter your subject’s skin tone. Soft, diffused lighting works best for highlighting natural beauty.
Creating Mood with Light
The placement and intensity of your lights can dramatically change the mood of your portraits. Use backlighting for a dreamy effect or side lighting for a more dramatic look.
Studio Lighting for Product Photography
Highlighting Details
Use a combination of hard and soft lighting to bring out textures, edges, and colors in your product shots.
Eliminating Shadows
Position your lights strategically and use reflectors to minimize unwanted shadows in your product images.
Common Studio Lighting Mistakes to Avoid
Overexposure
Too much light can wash out your subject and reduce contrast. Always check your exposure settings and adjust your lighting accordingly.
Poor Positioning
Incorrectly positioned lights can create unflattering shadows or fail to highlight key features. Practice different setups to find what works best for your subject.
Top Studio Lighting Kits for Beginners
Affordable Options
If you’re just starting out, look for affordable kits that include basic lighting equipment like softboxes, light stands, and LED bulbs.
Mid-Range Kits
Mid-range kits offer better build quality and additional features, such as adjustable color temperature and more powerful lights.
Best Professional Studio Lighting Kits
High-End Recommendations
Professional kits come with advanced features like wireless controls, high-powered strobe lights, and modular designs for flexibility.
Features to Look For
When shopping for high-end kits, consider factors like power output, build quality, and versatility. Look for lights that allow fine control over brightness and color temperature.
DIY Studio Lighting Tips for Small Spaces
If you’re working with limited space, opt for compact lighting solutions like ring lights or small LED panels. Mounting lights on walls or ceilings can also help save space.
Maintaining and Storing Studio Lights
Investing in quality studio lights is essential for professional photography and videography, but equally important is maintaining and storing them properly. Regular care extends the lifespan of your equipment and ensures it performs at its best during every shoot. Here’s a guide on how to maintain and store your studio lights effectively.
Regular Cleaning
Dust and dirt can accumulate on your lights, affecting their performance and longevity. Here’s how to keep them clean:
Clean Bulbs and Lenses: Use a microfiber cloth to wipe down bulbs and lenses regularly. Avoid using harsh chemicals, as they can damage the surface.
Check Ventilation Grills: Dust can clog the ventilation openings, causing your lights to overheat. Use a small brush or a can of compressed air to remove any buildup.
Clean Reflectors and Softboxes: Reflectors and softboxes can also collect dust. Wipe them down gently with a dry cloth to maintain their reflective properties.
Inspect for Wear and Tear
Routinely inspect for any signs of damage, including:
Frayed Cables: Inspect power cords and connectors for wear. Immediately replace any damaged cables to prevent electrical hazards.
Loose Screws and Mounts: Screws and mounts may loosen over time.Tighten them periodically to ensure your lights stay secure during use.
Bulb Lifespan: Some types of bulbs have a limited lifespan. Monitor how long you’ve been using them and replace them when they start to flicker or lose brightness.
Proper Handling During Use
Handling your lights with care minimizes the risk of damage:
Avoid Overheating: Continuous lights, especially older models, can get very hot. Allow them to cool down before turning them off or moving them.
Secure Light Stands: Ensure your light stands are stable and properly weighted, especially when using heavy equipment. Sandbags can help stabilize your setup.
Use Gloves for High-Heat Bulbs: If you need to replace high-heat bulbs, wear gloves to avoid burns and prevent oil from your hands transferring to the bulb, which can cause hot spots.
Safe Storage Practices
When not in use, store your studio lights in a way that protects them from damage:
Use Storage Bags or Cases: Invest in padded storage bags or hard cases specifically designed for lighting equipment. These provide cushioning and prevent scratches or dents.
Wrap Cables Properly: Loosely coil cables and use Velcro ties to keep them organized. Avoid tightly wrapping cords, as this can lead to breakage.
Store in a dry, cool place: Moisture and extreme temperatures can harm your lights. Store them in a cool, dry environment, away from direct sunlight or humidity.
Periodic Maintenance Checks
Schedule regular maintenance checks to keep your equipment in top condition:
Test Lights Before Each Shoot: Power on your lights and check for any flickering, buzzing sounds, or reduced brightness before each session.
Professional Servicing: If you notice any persistent issues, consider having your lights serviced by a professional. This can include checking the wiring, cleaning internal components, and replacing worn parts.
Backup Equipment
Having backup bulbs, cables, and other accessories on hand ensures you’re prepared in case something fails during a shoot. Having spare parts on hand reduces downtime and prevents unexpected interruptions.
Conclusion: Why Investing in Good Studio Lights is Worth It
Investing in high-quality studio lights pays off in the long run. Good lighting not only enhances the quality of your work but also allows you to experiment creatively, giving you more control over your final output. Whether you’re a beginner or a seasoned professional, having the right studio lighting setup can elevate your photography and videography to the next level.
FAQs
What is the ideal lighting setup for small studios?
For small studios, a simple two-light setup with a key light and a fill light works best. You can add a reflector for additional lighting control.
How do I balance natural light with studio light?
Use natural light as your primary source and complement it with studio lights to fill in shadows or add highlights where needed.
Can I use studio lights for outdoor shoots?
Yes, portable LED lights or battery-powered strobes can be used outdoors to control lighting in various conditions.
How do I avoid harsh shadows in my shots?
Use softboxes or diffusers to soften the light and position your lights at an angle that minimizes harsh shadows.
What distinguishes soft lighting from hard lighting?
Soft lighting creates a gentle transition between light and shadow, while hard lighting produces sharp, defined shadows, making it ideal for dramatic effects.